Customizing the Layout
So far we have a horizontal row of buttons and a label, but they’re positioned in the top left corner. Let’s use layout modifiers to position the views in the center of the window with some space between them.
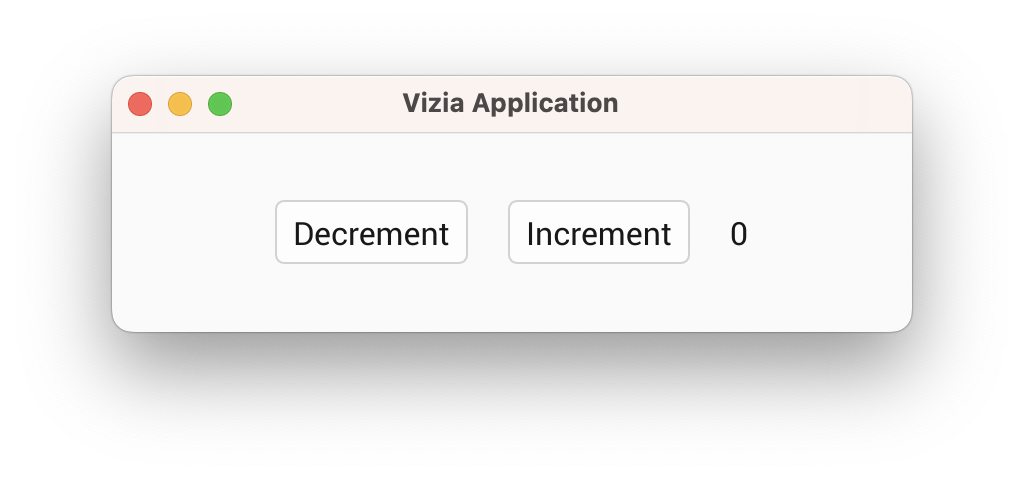
Centering the views
By default the HStack view will stretch to fill its parent, in this case the window. We can center the contents of the HStack using the alignment() modifier and setting it to Alignment::Center. Then we can add horizontal space between the children using the gap() modifier:
use vizia::prelude::*;

fn main() -> Result<(), ApplicationError> {
    Application::new(|cx|{

        HStack::new(cx, |cx|{
            Button::new(cx, |cx| Label::new(cx, "Decrement"));
            Button::new(cx, |cx| Label::new(cx, "Increment"));
            Label::new(cx, "0");
        })
        .alignment(Alignment::Center)
        .gap(Pixels(20.0));
    })
    .inner_size((400, 100))
    .run()
}
Understanding the layout system
The layout system used by vizia is called morphorm and can achieve results similar to flexbox on the web but with fewer concepts to learn. Vizia determines the position and size of views based on a number of layout properties which can be configured. A detailed guide of the layout system can be found here.